Sunday, 1 January 2012

Week 14

In week 14, my partner and me were asked to use database in OpenOffice.

STEP TO CREATE DATABASE


First, we need to open 'Open Office' and click on database. After that, you need to click on table.

After that, you need to type in what kind of the question that you want to be asked in a form.

When you finish type in all the question then you would like to save the data.

After you do the saving, then you would be asked to give a name for the title.


After that, you should put the mouse on the left side of the question that you just key in and there will be a green arrow to appear and you would like to chose what the question that you to be the 'primary key'. When you finish choosing then you just need to put the 'mouse' beside that question and double click it and there were be the word of 'primary key' to be appear. You just need to click on it. 


Then, you can key in all the data/information that you want to put on the table.


All of the step keep on repeating for the 'information of student', 'information of their family', 'cocuriculum' and 'curiculum'.

After that,you need to click on the form and then click 'use wizard to create table'.

After that, you just need to click on the button that is below the 'tables or queries'. When you finish choosing then you would like to move all the information in the left column to the right column but accept  the primary key.


After all, you would like to ask to click the button of 'next'.


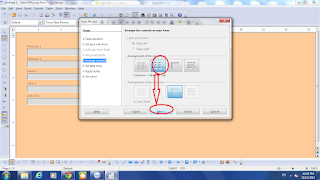
After come to the 'arrange control' then you can chose the type of the that you like and then click 'next'.


When come to 'apply style', then you can just the colour or the form that you want.

Lastly, you just need to click 'finish'.

All of the step keep on repeating for the 'information of student', 'information of their family', 'cocuriculum' and 'curiculum'.
After that, you need to click 'tool' and click the 'relationship'.

Then,you just need to link all the 'primary key'.

After that, you need to click 'queries' and click 'use to create query'.

Then, you would like to click the button that below the 'table' and chose which or the form that you want to do first.
Then, you need to move all the information from left column to the right column and then click 'next'.

Lastly, you just need to click 'finish'.

After that, a table which full of the information will be come out.

All of the step keep on repeating for the 'information of student', 'information of their family', 'cocuriculum' and 'curiculum'.

Lastly, come to the report. You would like to click 'use wizard to create report'.

Then, you need to click the button below 'tables and query'. You need to chose which one of the query that you want to change into report.

After that, you need to click 'next'.

When come to 'labelling field', then you can make a change for the style of the question that you ask.

  
Lastly, you are ask to click 'finish'.

After that, you need to exit and right click on the 'Query-maklumat pelajar'. Then, you need to click on the button of 'edit'.


Then, you can edit the report.

All of the step keep on repeating for the 'information of student', 'information of their family', 'cocuriculum' and 'curiculum'.


Week 13

In week 13, my partner and me were asked to do the planning of the budget in year 2012 and 1 table to record the mark of the student.

STEP TO CREATE THE PLANNING OF THE BUDGET IN YEAR 2012 BY USING SPREADSHEET 
First, open 'OpenOffice' and click spreadsheet. Then, you can key in all the information that you want.

To get the total amount of each allowance and expenses, you must click on the total amount and then press the button of `sum`. Then you highlight all the boxes that you want to sum.


After we finish key in all the data, we need to change the name of title from 'sheet 1' to 'Jan 2012'. By doing so, we just need to put the 'mouse' on the sheet 1 and then right click it and chose the word of 'rename'

After rename the sheet then we need to copy for all the 12 months. You just need to put the 'mouse' on 'Jan 12' then right click it and click 'move/ copy sheet'


Lastly, you need to click at 'sheet 2' then copy it and click ok.

Then, you can repeat the same things or step with the rest of the month.
When you satisfied with the report then you can save it and change it to pdf.


STEP TO CREATE A TABLE TO RECORD THE MARK OF THE STUDENT.

First, you need to open Microsoft Excel.  
Then,enter the name of the student, subjects, marks and also the minimum require for the grades.

You need to highlight the prior grades before you enter the grades in the empty states.

Then, you need to click 'formula' and 'define name'


After that, you need to chose vlookup and then click 'ok'.

After the boxes of 'vlookup' appear then you need to fill in the details and click on the boxes of score for the first grade at the lookup value. You also require to type the word of 'true' for the 'range_lookup'.

When finish key in the data then just click 'ok'  and the grades for the score will come out automatically.
Then, click on the first grades and highlight it and pull it down till the last person and the grades for each person will come out easily. Then, you can repeat the step for all the subjects.

STEP TO CALCULATE THE STANDARD DEVIATION
First click 'insert formula' at STDEV. You can repeat the step for all the subjects.


STEP TO CALCULATE MAXIMUM MARK
First you need to click 'insert function' and click 'max' and you can keep on repeating the step for all the subjects.

STEP TO CALCULATE MINIMUM MARK
First you need to click 'insert function' and click 'min' and you can keep on repeating the step for all the subjects.


STEP TO CALCULATE AVERAGE
First you need to click 'insert function' and click 'average' and you can keep on repeating the step for all the subjects.

STEP TO COUNT THE AMOUNT OF GRADE GETTING BY STUDENT ACCORDING TO THE SUBJECTS
Fist click 'insert function' then click 'countif' and you can keep on repeat the step for all the subjects.

STEP TO CREATE GRAPH
First, highlight the total amount of grades getting by the students according to the subjects. Then, you just to click 'insert' follow by 'column'. Then, you can chose the type of the graph that you like.


Then, the graph will be appear.